Wednesday, September 2, 2015

DNA Necklace

Here's a new twist on an old technique - a DNA Seed Bead Necklace with a pearl accent designed by Catharina Thomas for Fire Mountain Gems and Beads.

DNA Necklace with Pearl Accent
Project and Photo by Catharina Thomas

What "old technique" you may ask? Why it's the ever popular and oh so versatile Brick Stitch. Catharina's take on this stitch is how she makes it twist. I also love, love, love the built in beaded clasp as well.

Seed beads and any large round bead are all you need to create this necklace and there are plenty of step by step graphics to help you along.

Click HERE to find out how to make one.

Now go bead something.

Thursday, August 20, 2015

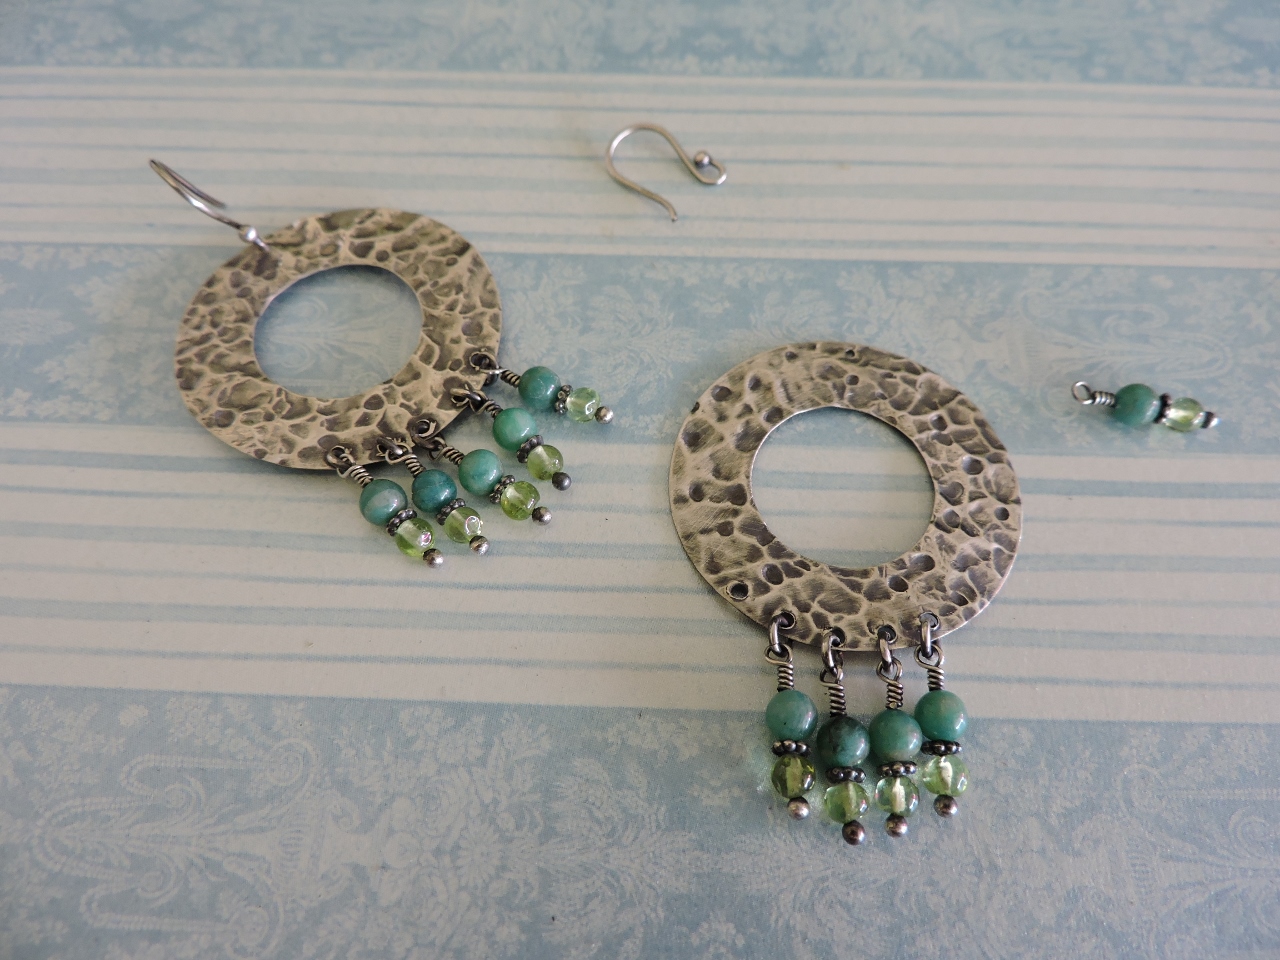
Easy Breezy Sterling Silver Earrings

If you love the Boho style or just the idea of swinging loops on your ears, you're going to love these Easy Breezy Sterling Silver Earrings at Rings & Things.

Easy - check, breezy - check, sterling silver - check and oh so trendy!

Don't have or can't afford sterling silver? No problem, you can substitute almost any other metal for the sterling including aluminum, copper or even nickel. And, if you buy the loop blanks the only other tool you need are some round chain nose pliers.

Anyway, click HERE to learn how to make you a pair or two or three.

Now go bead something.

DSCN7838 (1280x960)
Easy Breeze Sterling Silver Earrings
Project and Photo by Rings & Things

Tuesday, August 18, 2015

Daisy Chain Necklace or Bracelet

Here is a perfect end of summer project for you to make - it's a classic stitch and, although, I have a tendency to say this a lot - I love this stitch.

Daisy Chain Bracelet or Necklace
Photo and Project by Sandra Halpenny

This project can be retro or modern depending on the beads and color that you use. And, don't forget, this can also be made into an anklet.

Perfect for all your boho loving friends or flower children or, really, anyone on your list.

Click HERE to find out how to make one.

Now go bead something.

Wednesday, August 12, 2015

AUGUST 2015 MEETING

August Program
Spiral Bracelet (right)
Variation (left)
Our Next Meeting:
Saturday, August 15, 2015
10:00 am to 12:30 pm
St. Martin's Episcopal Church
717 Sage Road - Blast Kitchen Meeting Room

Program:
Flat Spiral Bracelet with Tish Reed
Kits - $10.00
 
Materials Needed:
- 28 to 30 6mm crystal bicones or similar
- 56 to 60 4mm crystal bicones or similar
- Approx. 5 grams of size 10 or 11 seed beads
- Beading needle and thread
- Clasp

Sign up now to become a member or don't forget to renew your membership!


Beaded Napkin Rings

Imagine throwing a dinner party for your friends... the lighting is perfect, the food is delicious and the place settings... well, your place settings are going to need these beautiful napkin rings created by Dans le Lakehouse.

Beaded Napkin Rings
Photo and Project by Dans le Lakehouse

A little wireworking skills, wire and beads are all you  need to make this lovely addition to any gathering. But, wait - there's more! It can double as a cuff bracelet! So, wouldn't it make a great favor for a bridesmaid lunch, baby shower or bridal shower?

I've said it many times - I love projects like this because what beader doesn't have leftover beads from previous projects? Mine usually end up in a bead soup, but I think I'm going to start gathering them up for this project.

Mosey on over HERE to find out how to make them.

Now go bead something.

Thursday, August 6, 2015

Embellished Ladder Stitch Bracelet

The Ladder Stitch is one of the very first bead techniques I learned when I first started beading. To this day - along with the spiral stitch - it's one of my very favorite bead techniques I know.

If you don't know the Ladder Stitch, this Embellished Ladder Stitch Bracelet is the perfect project for you to create while learning this very versatile stitch. Even if you already know it, this bracelet is good practice and will work up very quickly.

Embellished Ladder Stitch Bracelet
Project and Photo by Bead and Button
Not only is the Ladder Stitch easy to learn and quick to work up, the variations are endless - simply by changing the number, type or color beads you use.

Click HERE for a video tutorial of this really lovely and versatile bracelet.

Now go bead something.

Monday, August 3, 2015

Top 10 Tips for Beginning Jewelry Makers

Here's some handy dandy little tips beaders/jewelry makers should consider when they finally begin to think about getting serious about their work.

Photo by craftsy.com

From taking classes to mastering skills, the list really does cover a good amount of topics (tips) that every jewelry maker/beader should think about.

My favorite? Have a dedicated and organized workspace. This doesn't mean that you absolutely must have an entire room to work in. But, I think everyone deserves their own private workspace even if it's just a corner in your bedroom or an unused closet.

Click HERE to see the entire list.

Now go bead something.

Wednesday, July 29, 2015

Love Your Hands!

Whether you are a beader, painter, woodworker or artist in general, our hands are probably the most important tool we use. And, if you are like me, you can get so engrossed in a project that you easily lose track of time and forget to take a break.

But, it's time we learn to appreciate and love our hands by giving them a break. Here is a chart created by We are Knitters of easy to do exercises to help our hands relax and get them ready for another round of beading.

Graphic by We Are Knitters
Sure, this was created by a knitter, but it is useful for all of us - especially beaders.

You wouldn't leave a paint brush in thinner, you wouldn't leave a tube of paint open and you certainly wouldn't leave your beloved Swarovski crystals are strewn about - so, treat your hands (and your body) to an occasional break with some nice stretching exercises and they will help you continue your next beading masterpiece in a less painful manner.

Thanks to We are Knitters for the hand exercise tips!

Now go bead something - but, take a break - will ya?

Tuesday, July 28, 2015

Plant Stand Pendant Display

As you probably already know, Houston Bead Society has an upcoming bead show set for October 23 through 25, 2015 - check it out by clicking HERE.

So, when I saw this Pendant Display made out of a plant stand, I thought I'd share it here.

2013 Artoberfest
Plant Stand Pendant Display
Photo and Project by Mary Lyda
Mary says she was trying to come up with some DIY displays when she found this plant stand in her bathroom. The stand is actually a faux metal plastic stand in a gold color with black accents, but she cut pieces of burgundy fabric to help showcase her pieces. I think it looks great. 

So, if you are doing some shows this coming Fall, you might want to find a plant stand (try thrift stores) and make your own display. Even if you're not, I think this would look really pretty sitting on a bedside table or dresser.

So click HERE to find how how Mary Lyda made it.

Now go bead something.

Wednesday, July 22, 2015

Beaded Flower Pendant

Beads by Becs has this adorable beaded flower tutorial on her blog using seed beads and an 8mm chaton. Check it out:

Beaded Flower
Project and Photo by Beads by Becs
Beads by Becs uses the herringbone stitch to bezel around the 8mm chaton then embellishes it with seed beads. And, this sweet little beaded flower (she uses an 8mm chaton afterall) can be used on its one or as a component to another piece. There are endless possibilities for this project simply by changing the color or color combinations that you use. And, it's so easy to do, you can do this with your favorite kiddo.

Click HERE to get all the how tos.

Happy Summer Y'all!

Now go bead something.


Friday, July 10, 2015

Silky Cameo Bracelet

Linda at Linda's Crafty Inspirations is so clever and her designs are so pretty. In fact, check out this gorgeous Silky Cameo Bracelet she designed recently (and is sharing her pattern for FREE!).

Silky Cameo Bracelet 
Photo and Pattern by Linda's Crafty Inspirations

Silky Cameo Bracelet
Photo and Pattern by Linda's Crafty Inspirations
The bracelet is not difficult to make and her color choices are to die for - check them out on her blog. And, her instructions come in a pdf format with lots and lots of step by step directions and graphics. Best of all, it uses those new "silky" beads we've all been itching to use.

So, get you some Silkys, pull out your seed beads and make a whole bunch of these (your family and friends will want their own when they see yours). Click HERE to get the pattern.

Now go bead something.

Tuesday, June 30, 2015

Patty Perline's Lucky Phone Charm

Check out this little cutie by Patty Perline!

Lucky Phone Charm
Photo and Project by Patty Perline
Patty uses the hottest bead on the market right now - Super Duos - to create this little cutie to hang on your phone. The design is really easy to create with Patty's step by step graphic tutorial. And, with a design this cute, who wouldn't want to make one (see what I did there)?

Any who, click HERE to find out to make your own lucky phone charm.

Now go bead something.

Thursday, June 25, 2015

Japanese Fan Earrings

Japanese Fan Earrings
Photo and Project by Handmade Jewelry Club
Here's another earring project to help you learn or warm up your Brickstitch skills - Japanese Fan Earrings by Handmade Jewelry Club.

Although this is the second Brickstitch tutorial I've posted this week (see Cha Cha Earrings from June 22, 2015), this tutorial goes on to teach you Brickstitch increases and descreases in a very detailed and graphic way and it only takes 12 easy steps


So, yes you can make these!

Like most earrings projects, it doesn't take a lot of beads to make and it is a great way to use up some leftover beads.

Click HERE to find out how to make your own pair of Japanese Fan Earrings.

Now go bead something.

Monday, June 22, 2015

Cha-Cha Earrings

Ooh lala - check out these Cha-Cha earrings by beadwork.com 

Cha-Cha Earrings
Photo and Project by beadwork.com
Normally, I am not a pink person, but I am loving the luscious colors on these swingy, stylish earrings. Oh yeah - did I mention - hoops? I love hoops.

Anyway, it uses the old tried and true brick stitch. Earrings are such a fast project to make and it's a great way to practice an old (or a new) technique for a few hours. I often make earrings when I haven't used a particular stitch in a while to not only refresh my memory on the technique, but to warm me up for the real project.

So click HERE to find out how to make your own. Wouldn't they look fabulous in blues?

Now go bead something.


Wednesday, June 17, 2015

Star Power Bracelet by Nichole Starman

Star Power Bracelet
Project and Photo by Nichole Starman
Check out this awesome bracelet by Nichole Starman!

Nichole uses the ever popular RAW (Right Angle Weave) stitch to create this really lovely and light bracelet. Don't ya love her color selection too?

Her instructions are super clear and with only five steps that you have to repeat over and over, you'll have you own bracelet made in no time.

Click HERE to get all the how tos.

Now go bead something.

Wednesday, June 3, 2015

Lashed Wrapped Bracelet

 I can't get enough of these bracelets and, by the looks of it, neither can anyone else.

Photo and Project by Fire Mountain Gems
These boho style wrapped bracelets are everywhere - on television, on the runway and in magazines and they run the range from complex multiple wraps to simple one wrap ones like the one pictured above.

Use whatever beads you have and add a simple button or a funky component as the closure and you have your own lashed and wrap bracelet to wear.

Easy to make, easy to wear (I like wearing a whole bunch of them on my wrist), click HERE to find out how.

Now go bead something.

Monday, June 1, 2015

Preserving a Memory in Resin

Wedding and prom season is coming up, so wouldn't you love to preserve a corsage or flower from a bouquet and then present it to the recipient as a permanent keepsake?

Project and Photo by
Tammy Swallow
This project by Tammy Swallow walks you through step by step on how to create a special memento using resin and molds.

She uses flowers, but why not a piece of fabric from a special dress, a shell or leaf from a vacation or even some hair from a child's first haircut! The possibilities are endless.

Even if you don't want to use this two part resin, there are lots of easier to use alternatives on the market - like Lisa Pavelka's Magic Gloss. And if you don't have or can't find the molds, try a ready made bezel instead.

Click HERE to check it out.

Now go bead something.

Tuesday, May 26, 2015

7 Stamped Metal Ideas

Stamping metal blanks is so very trendy right now - in fact, you can get almost everything you need at your favorite art or crafts supply store.

If you like to try your hand at metal stamping or if you're an experienced metal worker, here are seven metal stamping projects by Craft Gossip for you to check out.

Photo by Craft Gossip
From key fobs to garden markers, I'm sure you'll find something you'll want to try.

Click HERE to see all the projects.

Now go bead something.

Wednesday, May 20, 2015

Lovely Lacey Bracelet

Lovely Lacey Bracelet
Photo and Project by Linda's Crafty Inspirations
There is so much to love about this bracelet - the colors (swoon), the magnetic clasp (goes so well and it's so much easier to wear) and the design (so medieval and yet so modern).

Since it uses 3 or 4mm druks for the flower centers and upper lacey part, it's sure to go very fast. Click HERE to go to Linda's Crafty Inspirations and download the PDF pattern for this simply lovely bracelet.

Now go bead something.

Monday, May 18, 2015

Star Pendant

Star Pendant
Project and Photo by
handmade-jewelry-club.com
I've said it before - I love projects that sometimes just take a few beads because who doesn't have a few beads left over from other projects?

So check out this lovely Star Pendant made with Swarovski crystals created by the Handmade-Jewelry-Club.

Super instructions accompanied by photos make it an easy to follow project.

Check it out HERE.

Now go bead something.

Thursday, May 14, 2015

Peyote Channel Bracelet

Last week, I wrote about the classic and versatile Peyote stitch. How no matter what - it never really goes out of touch. Sure, right now Right Angle Weave seems to be the favorite kid on the block, but sometimes a project comes up that you simply must make; and, when I saw this bracelet, I knew I had to share it with you.

Peyote Channel Bracelet
Project and Photo by Whimbeads.com
This bracelet involves making an even count flat peyote strip that gets "buckled"  when you add the 4mm faceted round beads - really, such a clever way to add texture and shape to what would otherwise be a rather plain bracelet. And, it's easy too.

Click HERE to get all the how tos.

Now go bead something.

Tuesday, May 12, 2015

MAY MEETING

SATURDAY - MAY 16, 2015
10:00 am to 12:00 pm

NEW MEETING LOCATION:
St. Martin's Episcopal Church
Blast Kitchen and Community Room
717 Sage Road
Houston, TX 77056

DRIVING DIRECTIONS:
Driving South on 610 (towards the Galleria), take the Woodway/Memorial exit and make a right on Woodway (away from Memorial Park). Go straight on Woodway for about 1/2 mile and make a left on Sage. St. Martin's Episcopal Church is located on the corner of Woodway and Sage. Turn left into the church's 3rd driveway (just past the Riverway street sign on your left).

The Blast Kitchen and Community Room is located in the last entrance to the building (past the portico) before you exit the parking area. Look for a small sign that reads "Community Center Room."

PARKING:
Park anywhere; but, the most convenient place to park is near the middle to the end of the building.

PROGRAM:
Mosaic Eggshell Pendants with Katy Edwards: Kits - $8.00
Include all the supplies needed to make two pendant necklaces.
  • Two prepainted and drilled craft wooden pieces
  • Cleaned egg shells
  • Large jump rings
  • Two necklace cords
  • Super glue
May 2015 Program
Mosaic Eggshell Pendants
Project and Photo by Katy Edwards

TOOLS NEEDED:
  • Tweezers

Swirly Bracelet

This bracelet looks like it would be difficult to bead; but - guess what?? It isn't.

Photo and Project by
Cabbycraft.BlogSpot.com
It's really a simple project that makes for a lovely, dainty bracelet. So, grab your crimpers or flat nose pliers, wire cutters, beads, crystals and get to beading.

Click HERE to get all the how tos.

Now go bead something.

Saturday, May 9, 2015

Chain Maille and Pearl Bracelet

Here's a super duper easy pictorial tutorial if you like chain maille and pearls!

And, it's a very clever way to capture a pearl or your favorite gemstone in between the chain maille links.

Click HERE for a super sized picture of the tutorial.

Now go bead something.

Thursday, May 7, 2015

Peyote Hoops Tutorial

Peyote is one of the most basic bead stitches that everyone learns - usually at the beginning. And, although it's popularity (remember the amulet bag craze?) wanes and ebbs, it's never really totally out.

Despite the fact that it can be finicky and always looks like a train wreck for the first couple of rows, it does somehow magically comes together and when it does - magic happens. It is one of my all time favorite stitches.

So, check out this Peyote Hoops Tutorial by the blogger at Love My Art Jewelry.

Peyote Hoops
Tutorial and Photo by
Love My Art Jewelry
These hoops are so versatile that they can be anything from components to the main focal in any piece you may want to create.

So, isn't it time you revisit the Peyote Stitch?

Click HERE to see how.

Now go bead something.

Tuesday, April 21, 2015

Deb Roberti's Cupola Bracelet

Check out this Cupola Bracelet designed by Deb Roberti:

Cupola Bracelet
Photo and Picture by
Deb Roberti
Available at Red Panda Beads
Not only is the design kinda heavenly, but those color combos - swoon!! Deb Roberti is a very prolific designer and beader and I often go to her projects when I need something different, but still easily doable.

So, when I saw this Cupola Bracelet design, I just knew I had to share it with you all.

Click HERE to get the PDF pattern. Don't freak out, because you will be directed to Red Panda Beads to "order" the project instructions and it will ask for your shipping information (but, no credit card info); however, the pattern is a free download - so no worries.

But, check it out, it will be so worth it!

Now go bead something.

Tuesday, April 14, 2015

Carving Tagua Nuts - The Easy Way

Ahh... the sweet, innocent and misunderstood tagua nut. So, brown and so (in my opinion) plain.


Tagua Nut Beads

But, that was then... this is now!

Carved Tagua Nuts
Photo and Product by Matt Grimes
Wow - cannot even seem to express how awesome I think these are.

But, guess what? Why buy carved tagua nuts (as awesome as Matt's work is), when you can carve your own original designs? 

How to Carve a Tagua Nut
Project and Photo by
Fire Mountain Gems
Fire Mountain Gems shows you how easy it really is to carve your own tagua nut using the very basic and simplest of tools. And, with all the different dyed colors they come in now, there is no reason for the tagua nut to be plain anymore.

Click HERE to find out how easy it really is.

Now go bead something.

Saturday, April 11, 2015

APRIL 2015 MEETING

NEW MEETING LOCATION:
St. Martin's Episcopal Church
Blast Kitchen and Community Room
717 Sage Road
Houston, TX 77056

DRIVING DIRECTIONS:
Driving South on 610 (towards the Galleria), take the Woodway/Memorial exit and make a right on Woodway (away from Memorial Park). Go straight on Woodway for about 1/2 mile and make a left on Sage. St. Martin's Episcopal Church is located on the corner of Woodway and Sage. Turn left into the church's 3rd driveway (just past the Riverway street sign on your left).

The Blast Kitchen and Community Room is located in the last entrance to the building (past the portico) before you exit the parking area. Look for a small sign that reads "Community Center Room.

PARKING:
Park anywhere; but, the most convenient place to park is near the middle to the end of the building.

APRIL PROGRAM:
Color Selection
June Huber

Color selection can be a challenge in any art or craft, but especially in beading. This month, June will present a portion of her Master Class from last year's Bead & Button Show. We will talk about how to get the right amount of contrast, how colors affect perception of shapes and how colors interact with each other. No supplies needed - except paper and pencil to take notes. June will bring lots of examples and some hands-on activities for participants to try out. Feel free to bring any of your beading where the colors are giving you some trouble and June will try to help.

Tuesday, April 7, 2015

Beaded Tennis Bracelet

Although my wrist is small, I really love the look of big chunky bracelets - and a whole lot of them at once. But, when I saw this sweet little bracelet by Sandra Halpenny, I just knew I had to share it with you.


                          Beaded Tennis Bracelet
             Photo and Project by Sandra Halpenny

This bracelet is only one row wide and works up really fast thanks to Sandra's good written and illustrated instructions. And, of course, those sparkling crystals just add so much to the charm of this little bracelet.

Click HERE to find out how to make some.

Now go bead something.

Tuesday, March 24, 2015

Beaded Flower Earrings
Photo and Project by The Learning Center
In honor of Spring 2015, I am posting this sweet little pair of Beaded Flower Earrings I found at the Panda Hall's Learning Center.

The earrings are made with a very simple stitch that I think anyone can do.

These earrings have two basic flower components to them, but I would add a third because I really like long earrings that almost reach the shoulder. If you like smaller, more delicate earrings, then you could easily stop just at one flower.

Either way - the choice is yours once you start making them.

Click HERE to find out how to make 'em.

Now go bead something.


Wednesday, March 18, 2015

Danish Love Knot

I love tutorials that teach you technique because then you can use it in several projects - like this Danish Love Knot by blueforestjewelry.


Basic Danish Love Knot
Photo and Project by blueforestjewelry

Once you learn the basic design, you can make a variety of projects with it. Like this pair of Danish Love Knot Earrings:

Danish Love Knot Earrings
Photo and Project by blueforestjewelry
Or even this Danish Love Knot Bracelet:


Danish Love Knot Earrings
Photo and Project by blueforestjewelry
The tutorial knot (get it?) only teaches you the basic Danish Love Knot, but you create it directly from the spool of wire - so no waste!

Click HERE to find out how to make one.

Now go bead something.

Tuesday, March 17, 2015

Easy Peasy Beaded Mirror

Beaded Mirror
Photo and Project by Delineate Your Dwelling.com
Sometimes a girl (or a guy) just needs a beaded mirror and here's one that's super easy to make. Hot glue, beads, a round mirror (try another geometric shape instead) and some cardboard are all you need - though I would probably use some thin plywood if this was going in a bathroom or other humid environment. Did you know any big box home improvement store will usually cut the plywood for you for free!? And, remember you could always recycle a mirror too.

Click HERE to find out how to make one.

Now go bead something.

Saturday, March 7, 2015

Celtic Knots Bracelet

Here's a project that's sure to garner some attention for you (and save you from some "pinches") when you wear it for St. Patrick's Day.

Celtic Knots Necklace
Project and Photo by laterlife.com
It may look complicated, but it really isn't - and - there are plenty of step by step photos to help you along.

Click HERE to make your own.

Now go bead something.

Thursday, March 5, 2015

Hugs and Kisses Bracelet

Hugs and Kiss Bracelet
Project and Video by beadifulnights
Just in case you need a hug or a kiss or both, here is a Hugs and Kisses bracelet that you can make this weekend.

Best of all - yep - it's a video, so you can stop it, forward it , back it up or whatever you need to catch up while you're making it.

Click HERE to find out how to make one.

Now go bead something.

Sunday, March 1, 2015

Criss Cross Bracelet

Here is a pretty little crystal bracelet designed by Deborah Roberti:


Criss Cross Bracelet
Project and Photo by Deborah Roberti at Around the Beading Table
Deborah uses RAW (right angle weave) to create this little beauty and, although she made a double row bracelet, I think you could easily stop and just one.

Plenty of step by step photos help you through the process - so, if you are new to Right Angle Weave, this is the perfect project to get your feet wet. If you already know RAW, then go ahead and make one - how about making it into a cuff by adding a few more rows -  huh?

Any who, click HERE to learn how.

Now go bead something.

Thursday, February 19, 2015

FEBRUARY MEETING

WHEN: February 21, 2015
TIME: 10:00 a.m.
WHERE: 750 Bering Dr. - 1st Floor Conference Room
PARKING AND DRIVING DIRECTIONS:
Driving South on 610 (towards Galleria), take the Woodway/Memorial Dr. exit and make a right on Woodway (away from Memorial Park). Take Woodway for about about 1 to 1.5 miles to Bering Dr. and make a left (Bering is the next light after Chimney Rock). Then drive about one half mile to 750/800 Bering Dr. which is on your right. If you pass up Kelsey Seybold Clinic on Sugar Hill Road you just barely missed it.

Parking is in front of the building. The conference room is on the first floor of the Independent Bank Building. Entrance is through the front by the curved driveway.

PROGRAM: Circular Netting with Patti Berg
February Program
Circular Netting with Patti Berg
Bring:
  • seed beads
  • bead mats
  • stringing material of your choice
  • needles.
Don't forget to turn in your Bead It Forward Squares!

The Psychology In Color

Here's a very interesting and thought provoking article about the psychology of color and its use in the design and creation of jewelry written by Anne Marie Hunter, Marketing Content Development Group, Exclusively for Fire Mountain Gems and Beads®.

Design Idea E83Z Necklace and Earrings
Design and Photo by
Fire Mountain Gems and Beads®
Among other things, it explains that colors can cause both physical and emotional reactions and that "scientists have found that actual physiological changes take place in human beings when they are exposed to certain colors." Those reactions, however, are individual to each person but, include sensations of warmth or coolness.

It really is a pretty interesting read and you should read it now.

Click HERE to read more about the psychology of color and how it may help you in your jewelry designs.

Now go bead something.

Monday, February 16, 2015

Wire Wrapped Cocktail Ring

Do you have a fancy soiree coming up? Are you looking for that perfect statement ring to wear? Well, look no more. Check out this Wire Wrapped Cocktail Ring that Wyatt White created for Beadaholique.

Wire Wrapped Cocktail Ring
Photo and Project by Wyatt White for Beadaholique

This is a great project to show off one of the unique stones you picked up and don't know what to do with it. And, you get to learn how to make prongs too.

Even if you don't have a fancy party coming up and you're more a jeans and white t-shirt gal (or guy), you should make one. Click HERE to find out how.

Now go bead something.

Saturday, February 14, 2015

Happy Valentines Day - Bonus Project

Shrink Heart Earrings
Photo and Project by PopShopAmerica
Because it's Valentines Day and because it's my 28th wedding anniversary and because I happen to love, love, love hearts and because I especially love Shrinky Dinks - I'm giving you a special bonus Valentines Day Project!

Check out these cute Shrink Art Earrings (or make 'em pendants if you want) created by PopShopAmerica.

I love working with Shrink Art sheets - they are easy to cut (before they are shrunk), easy to color and very easy to get every style of design from whimsical (like these shown) to very sophisticated. I also think they are the perfect fun medium for kids to work with.

Click HERE to see how easy these shrink art components are to make.

Now go bead something.

14 Days of Valentines - Day 14

Happy Valentines Day!

This day is very special to me because not only is it one of my very favorite holidays (how could it not - hearts, chocolate, romance) but, it's also my wedding anniversary! This year marks 28 years married to the same goofball, I mean husband. Where does the time go?

Any who, that brings us to the last 14 Days of Valentines Day project - a pair of Beaded Heart Earrings designed by Sharon Bateman.

Photo by Wigjig and Project by Sharon Bateman
Although this one calls for the use of the Wigjig Olympus (a wire jig designed to make wirework easier), I think that with a little manipulation, you could do without it. I know I've seen several of these type of wired designs where the beads are wrapped around the main component using wire, but this one's a little different: you actually use thread and beadweave your way around the heart shape.

Cool - huh?

Click HERE to find out how it's all done.

Now go bead something.

Friday, February 13, 2015

14 Days of Valentines - Day 13

Hi Valentine Bracelet
Photo and Project by Fusion Beads
At first glance, you would think this little cutie was created using a bead loom - but, it's not. Nope, this "Hi Valentine" bracelet from the designers at Fusion Beads is a Two Drop Peyote project; and, if you already know the Peyote stitch, this one is a no brainer. Bonus - it works up pretty fast too because it uses two beads instead of one. So fast, you could probably start this afternoon and wear it tonight.

Click HERE for the pattern.

Now go bead something.

Thursday, February 12, 2015

14 Days of Valentines - Day 12

My heart was stolen by these "Steal My Heart" earrings by Lezli Goodwin for Beadworld.

Steal My Heart Earrings
Photo and Project by Lezli Goodwin for Beadworld
There's so many things I love about these earrings - the dangles, the silver wire and findings and, probably, most of all, the non-traditional use of blue crystals. All of which make them perfect for any occasion, but I could so see these being worn by bridesmaids at a beach themed wedding.

Click HERE to find out what you need to make some.

Now go bead something.

Wednesday, February 11, 2015

14 Days of Valentines - Day 11

My oh my - check out this lovely and sparkly Crystal Bracelet with a bonus - a sweet heart-shaped toggle clasp from the designers at Beading Daily!

Crystal Bracelet with Heart Toggle
Photo and Project by Beading Daily
There is so much to love about this bracelet (and I love bracelets) - crystals, pearls, seed beads, that adorable clasp and, it's so elegant too! If you want to make a statement piece to wear any time, any where, I think this would be it.

Click HERE to get all the how tos.

Now go bead something.

Tuesday, February 10, 2015

14 Days of Valentines - Day 10

My heart went a little pitter patter for this one. Why? Because I just happen to have a few Super Duos hanging out in my stash and I didn't have a clue as to what to do with them or even how.

Photo and Project by The Potomac Bead Company


Super Duos are two holed beads that can create dimensional shapes and projects. They are about 2.5mm by 5mm in size with two .08 mm holes. Most are pretty uniformed shape and their petal shaped edges also work great with bead embroidery.

Best of all, this is another video tutorial so you can try to create the project while watching the video because you can pause it or go back as needed.

Click HERE to view the video.

Now go bead something.

Monday, February 9, 2015

14 Days of Valentines - Day 9

Photo and Project by Honeybeads
Be still my beady heart! Check out this classic black and silver beaded heart by Honeybeads! This is such a classy look but, of course, you can always change up the colors and go wild!

The only thing I like better than photographs in a tutorial is a video and this one has a video that walks you step by step through all the how tos.

Click HERE to make your own beaded heart.

Now go bead something.

Sunday, February 8, 2015

14 Days of Valentines - Day 8

I couldn't - just couldn't - do a Valentines Day post without throwing in a polymer clay project.

Like this:

Heart of Many Dimensions
Photo and Project by Marie Segal for Favecrafts
And, of course, you don't have to make two (as in for earrings) - you can always make a larger one to use as a pendant. Not your colors? No problem - switch up the colors of the clay and you can get a entirely different look.

Click HERE to find out how to make these cuties.

Now go bead something.