Tuesday, October 22, 2013

Button, Button - Where's the Button?

Who among us does not have some sort of button collection? Whether they are our mom's or grandmother's old button collection or something we've started on our own, there is some attraction to buttons like there are with beads.

But, why just keep them stored away to be looked at once in while? Why not create something with some of those buttons and wear those memories on our wrist?

Well, Anna Nardulli shows us how to do just that.

Button Bracelet and Photo by
Anna Nardulli
Cute - yes. Trendy - yes. Easy to make - absolutely yes! All you need are some buttons (the amount depends on what size you plan on using), some twine (go the kitchen drawer and pull it out now because you know you will never use it to truss a chicken or a turkey or whatever you're supposed to truss) and some white craft glue.

Click HERE to get the how tos.

Now go bead something.

Monday, October 21, 2013

Bayou City Bead Works - Class Schedule

Bayou City Bead Works - Houston Bead Society's annual bead show is this week! And, along with world class shopping for beads, crystals, tools, components, metal arts, findings and more, there will also be classes. Best of all - they are very reasonable priced - just $25.00 (Bead Crochet demo is only $5.00) per class plus the cost of the kit.

Here is the schedule:

Saturday, October 26, 2013
10:00 to 11:30 - Bead Crochet Demo with Lillian Skogsberg
11:45 to 1:45 - Wonder Wheels Bracelet with Kathy Jolly/Bowerbirds
2:00 to 4:00 - Beady Spider with Kathie Yzaguirre/Kathie's Beads

Sunday, October 27, 2013
11:00 to 1:00 - Sterling Silver Viking Knit Bracelet with Laury Henry
1:15 to 3:15 - Russian Leaves with Carolyn Slater
3:30 to 4:30 - Tree of Life Pendant with Audra Gladney

Beaded Spiders with Kathie Yzaguirre

Russian Leaves with Carolyn Slater

Sterling Silver Viking Knit Bracelet
with Laury Henry

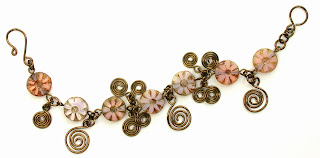
Wonder Wheels Bracelet with Kathy Jolly
Bead Crochet Demo with Lillian Skogsberg
Tree of Life Pendant picture coming soon!

Go to www.houstonbeadsociety.org for more information and to download a copy of the registration form.

See ya this week!

Wednesday, October 16, 2013

Faux Agate by Fall for DIY

Is it faux or is it real... agate? You decide.


If you guessed... faux, you would be right (photo and project by Fran, blogger at Fall for DIY). But, you have to admit you had a difficult time telling it apart from the real thing.

Would you believe it's made from polymer clay and crystal glass?? It is and you can learn to make one yourself by clicking HERE. It's super easy and Fran at the Fall for DIY blog has made it even easier by giving written instructions and a graphic how to. How cool is that?

Now go bead something.


Monday, October 14, 2013

BAYOU CITY BEAD WORKS

No doubt - Bayou City Bead Works is the bead show to go to if you are looking for quality made jewelry components, finished jewelry or classes.

Sponsored by Houston Bead Society and presented in a brand new facility - The Norris Conference Center at City Centre (816 Town and Country Lane) - this year marks our 15th anniversary for our show!

Featuring many Bead and Jewelry Artisans, shop for beads, crystals, metal arts, components, cords, findings, fibers, tools and lots, lots more. You can also learn some new jewelry making techniques or hone some of your own skills with classes.

Admission is only $7.00 or $6.00 with a printed copy of the flyer above.

Check out our website or the Bayou City Bead Works page on this blog for more information on becoming a vendor or to download a copy of the driving directions and a map. And, contact Shirley Nowlin to become a show volunteer - we need you!

So learn a new skill, buy some components, beads or tools to make some handmade Christmas projects for your family and friends or take a class and see what all the fun is about.

See you there.

Wednesday, October 9, 2013

Fairy Lights Necklace by Jewels of Sayuri

How can you not like a necklace named "Fairy Lights?" And, especially one that looks like this

Fairy Lights Necklace and photo by
Jewels of Sayuri

Not only is it light and oh so fairy looking, but it so on trend with the multiple layers of beads, chain, pearls and, of course, a lovely crystal drop. Use your favorite color crystals and beads and maybe even some of that vintage chain from your stash along with jump rings and some headpins and you'll be the belle of any ball!

Although, it is about 20 inches long not including the drop, you could obviously shorten it to your desired length.

So take out some of your findings, rhinestones, Swarovski Crystals and chain (vintage or new) and have lots of fun making one of these for yourself. Just so you know, I happen to love purple (wink, wink).

Click HERE to get the instructions.

Now go bead something.

Monday, October 7, 2013

Easy Three Step Earrings

There is easy and then there's easy! And, these cute earrings by Natalie at North Shore Days are super-easy.

3 Step Nail Polish Earrings by Natalie
at North Shore Days
So cute and so trendy, this project takes only 3 steps and a surprising material - nail polish! That and a couple of ear wires and some glass dome pendants (resources are on her site) are all you need to create a pair or two or three in your favorite colors.

Click HERE to get the how tos.

Now go bead something.


Thursday, October 3, 2013

DIY Cloth Watch Bands

Okay, so this project doesn't have beads - but you could easily add them on. And, just as importantly, it doesn't take away from the awesomeness of the project.

Kathy Cano Murillo also known as the Crafty Chica has designed this project using a piece of canvas (but, you could easily use scraps of fabrics) paint and/or paint pens and some hook and loop tape.

What a great way to get creative and make your own custom watchband for that tired, old, everyday watch.


Click HERE to get the instructions from the Crafty Chica herself.

Now go bead something.

Tuesday, October 1, 2013

Simple Pearl Studs

So, you're going to a special event tonight and you can't find a pair of earrings to go with what you are wearing. And, you have 15 minutes before your special someone waiting on you to finish decides to leave without you.

Though - in my case, I'm the one waiting on my husband! But, I digress.

What to do?

You pull out some glass pearls, some earring posts, bead caps, your trusty tube of E-6000 Glue and in just two (2) steps or about 10 minutes (the time it takes the glue to dry), you'll have your own pair of lovely pearl studs, like these that Vanessa at Cafe Craftea made:

Simple Pearl Studs - project and photo
by Cafe Craftea


These pearl studs are an elegant and classy addition to whatever you're wearing - be it a black dress and pumps or a white shirt and jeans.

Click HERE and go make you a pair or two or three.

Now go bead something.